How to Quickly Insert a QR Code in Google Slides Using an Image URL
In this tutorial, we’ll explore a quick trick to insert a QR Code directly into a Google Slides presentation using only an image URL (and a free service for QRCode generation). This method eliminates the extra steps of generating a QR Code with an external tool, downloading it, and uploading it into your slide — speeding up your workflow significantly.
Contents
- Why Use a Direct QR Code URL?
- What You Will Create
- Step 1. Insert an Image by URL
- Step 2. Use a QR Code Generation URL
- Step 3. Preview and Insert the QR Code
- Step 4. Adjust and Use in Your Presentation
- Bonus: Automating with DeckServe
- Conclusion
Why Use a Direct QR Code URL?
Manually generating and importing QR Codes into Google Slides can be tedious, especially when you need to create multiple codes for different slides. Using a direct image URL lets you:
- Skip the download/upload process
- Adjust QR Code parameters (size, content) on the fly
- Keep your workflow entirely within Google Slides
While this approach still produces a static QR Code, the speed and simplicity make it ideal for quick tasks.
What You Will Create
By the end of this tutorial, you will be able to insert a QR Code into a slide by simply pasting a generation URL into Google Slides’ Insert Image by URL feature.
We will use qrserver.com — a service that creates QR Codes dynamically via URL parameters.
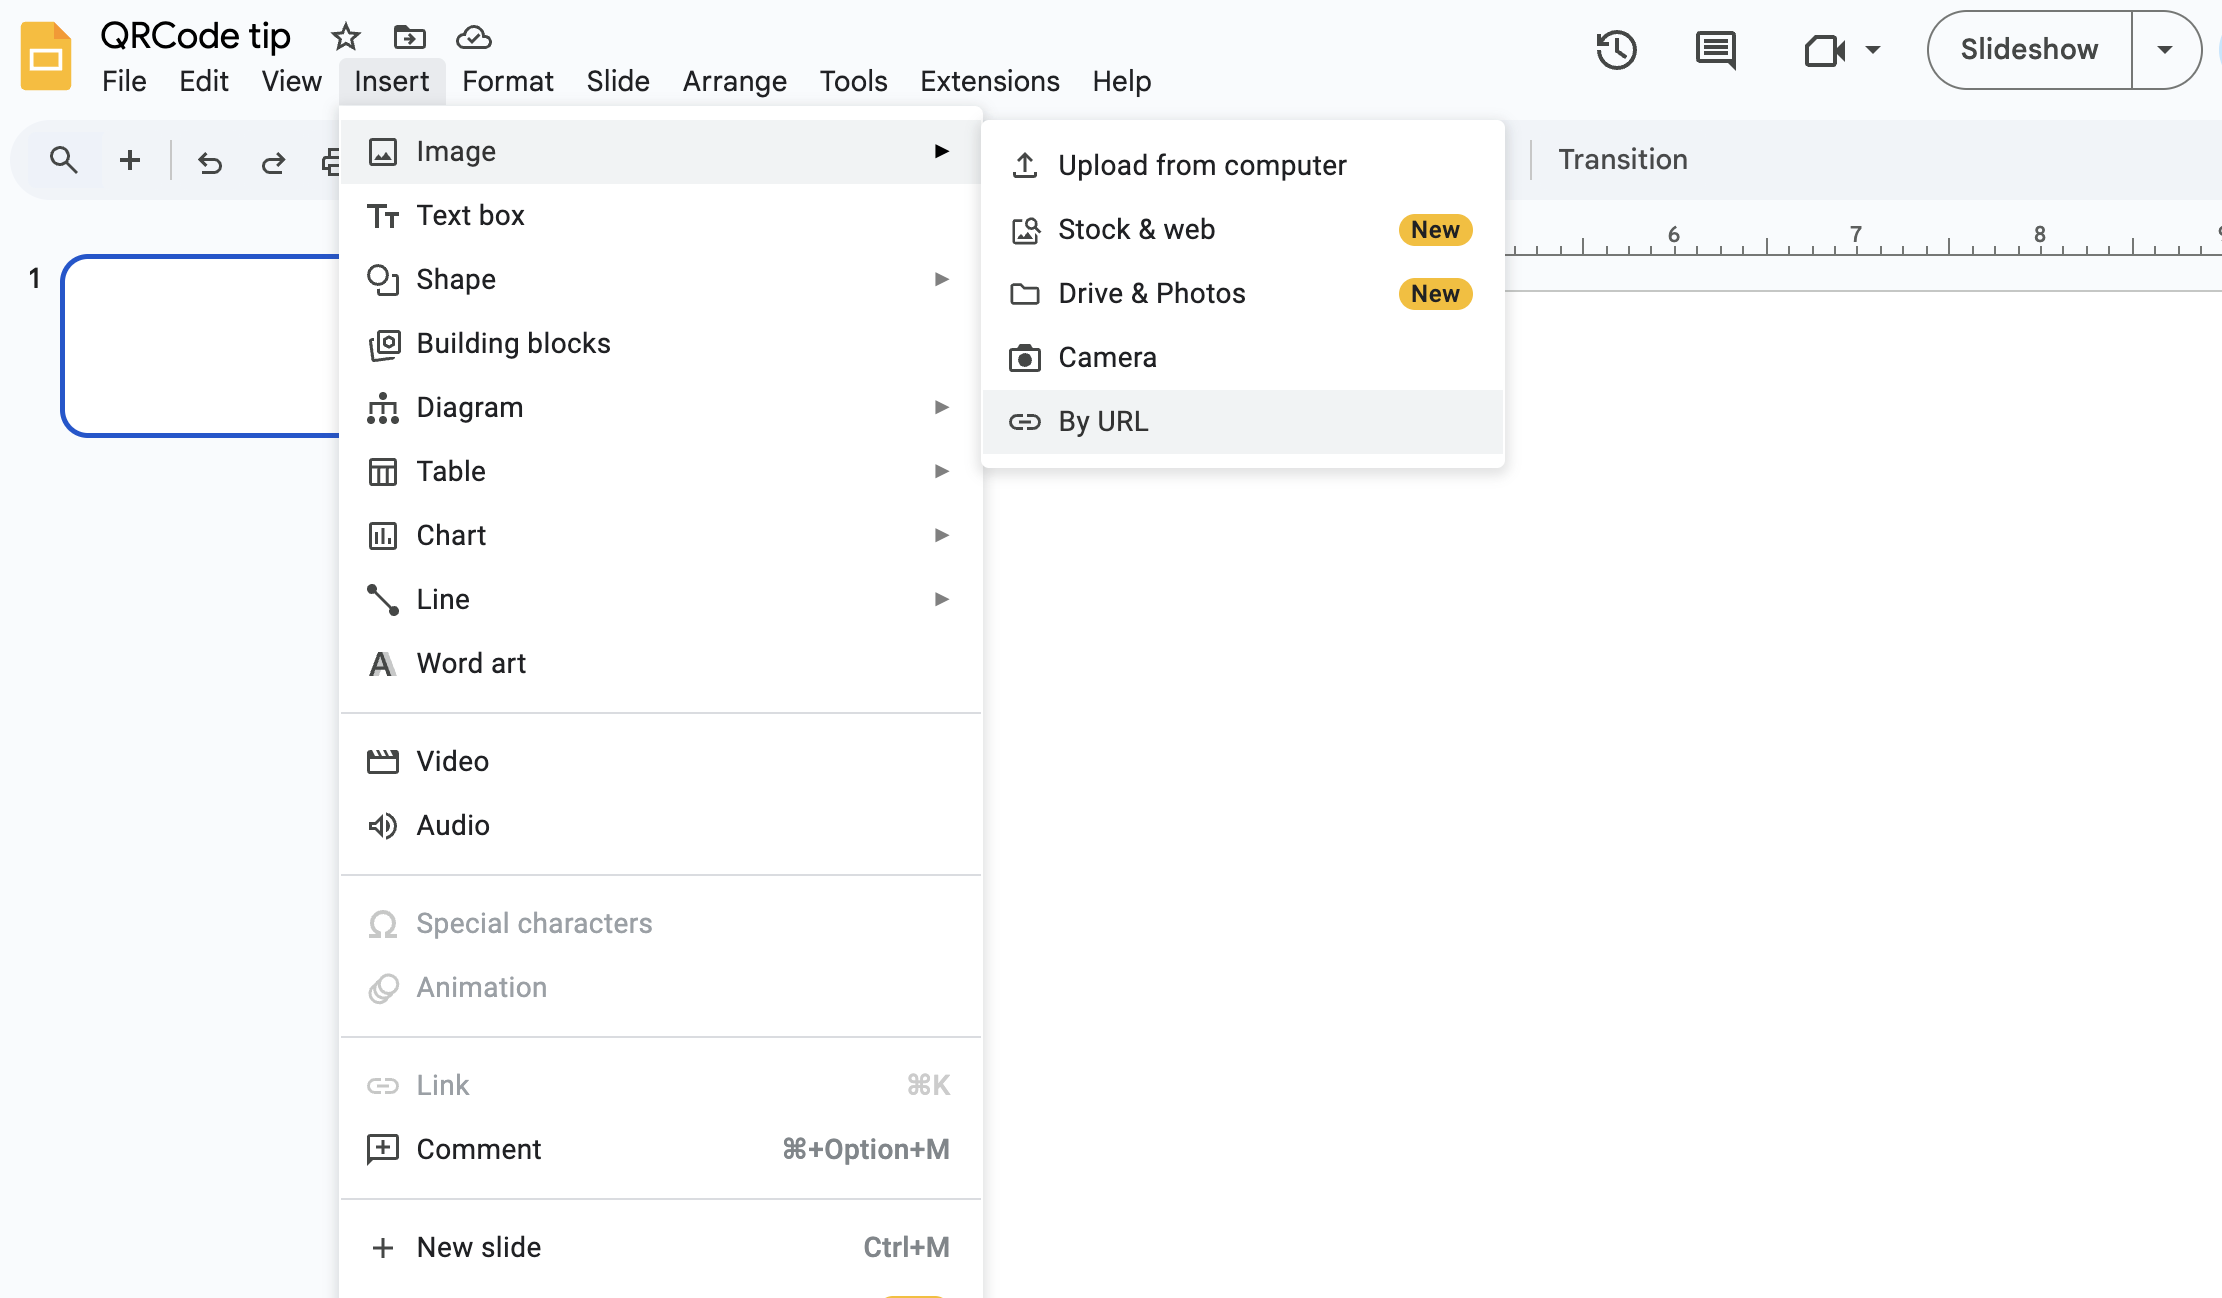
Step 1. Insert an Image by URL
Open your Google Slides presentation and navigate to the slide where you want the QR Code.
- Go to Insert → Image → By URL.
- A modal window will open, allowing you to paste an image link.
Step 2. Use a QR Code Generation URL
In the URL field, paste a link that points to a QR Code generated by qrserver.com.
A basic format looks like this:
https://api.qrserver.com/v1/create-qr-code/?size=150x150&data=YOUR_TEXT_HEREYou can customize:
- size — dimensions in pixels (e.g.,
150x150) - data — the text, link, or other content to encode
Example:
https://api.qrserver.com/v1/create-qr-code/?size=200x200&data=https://example.com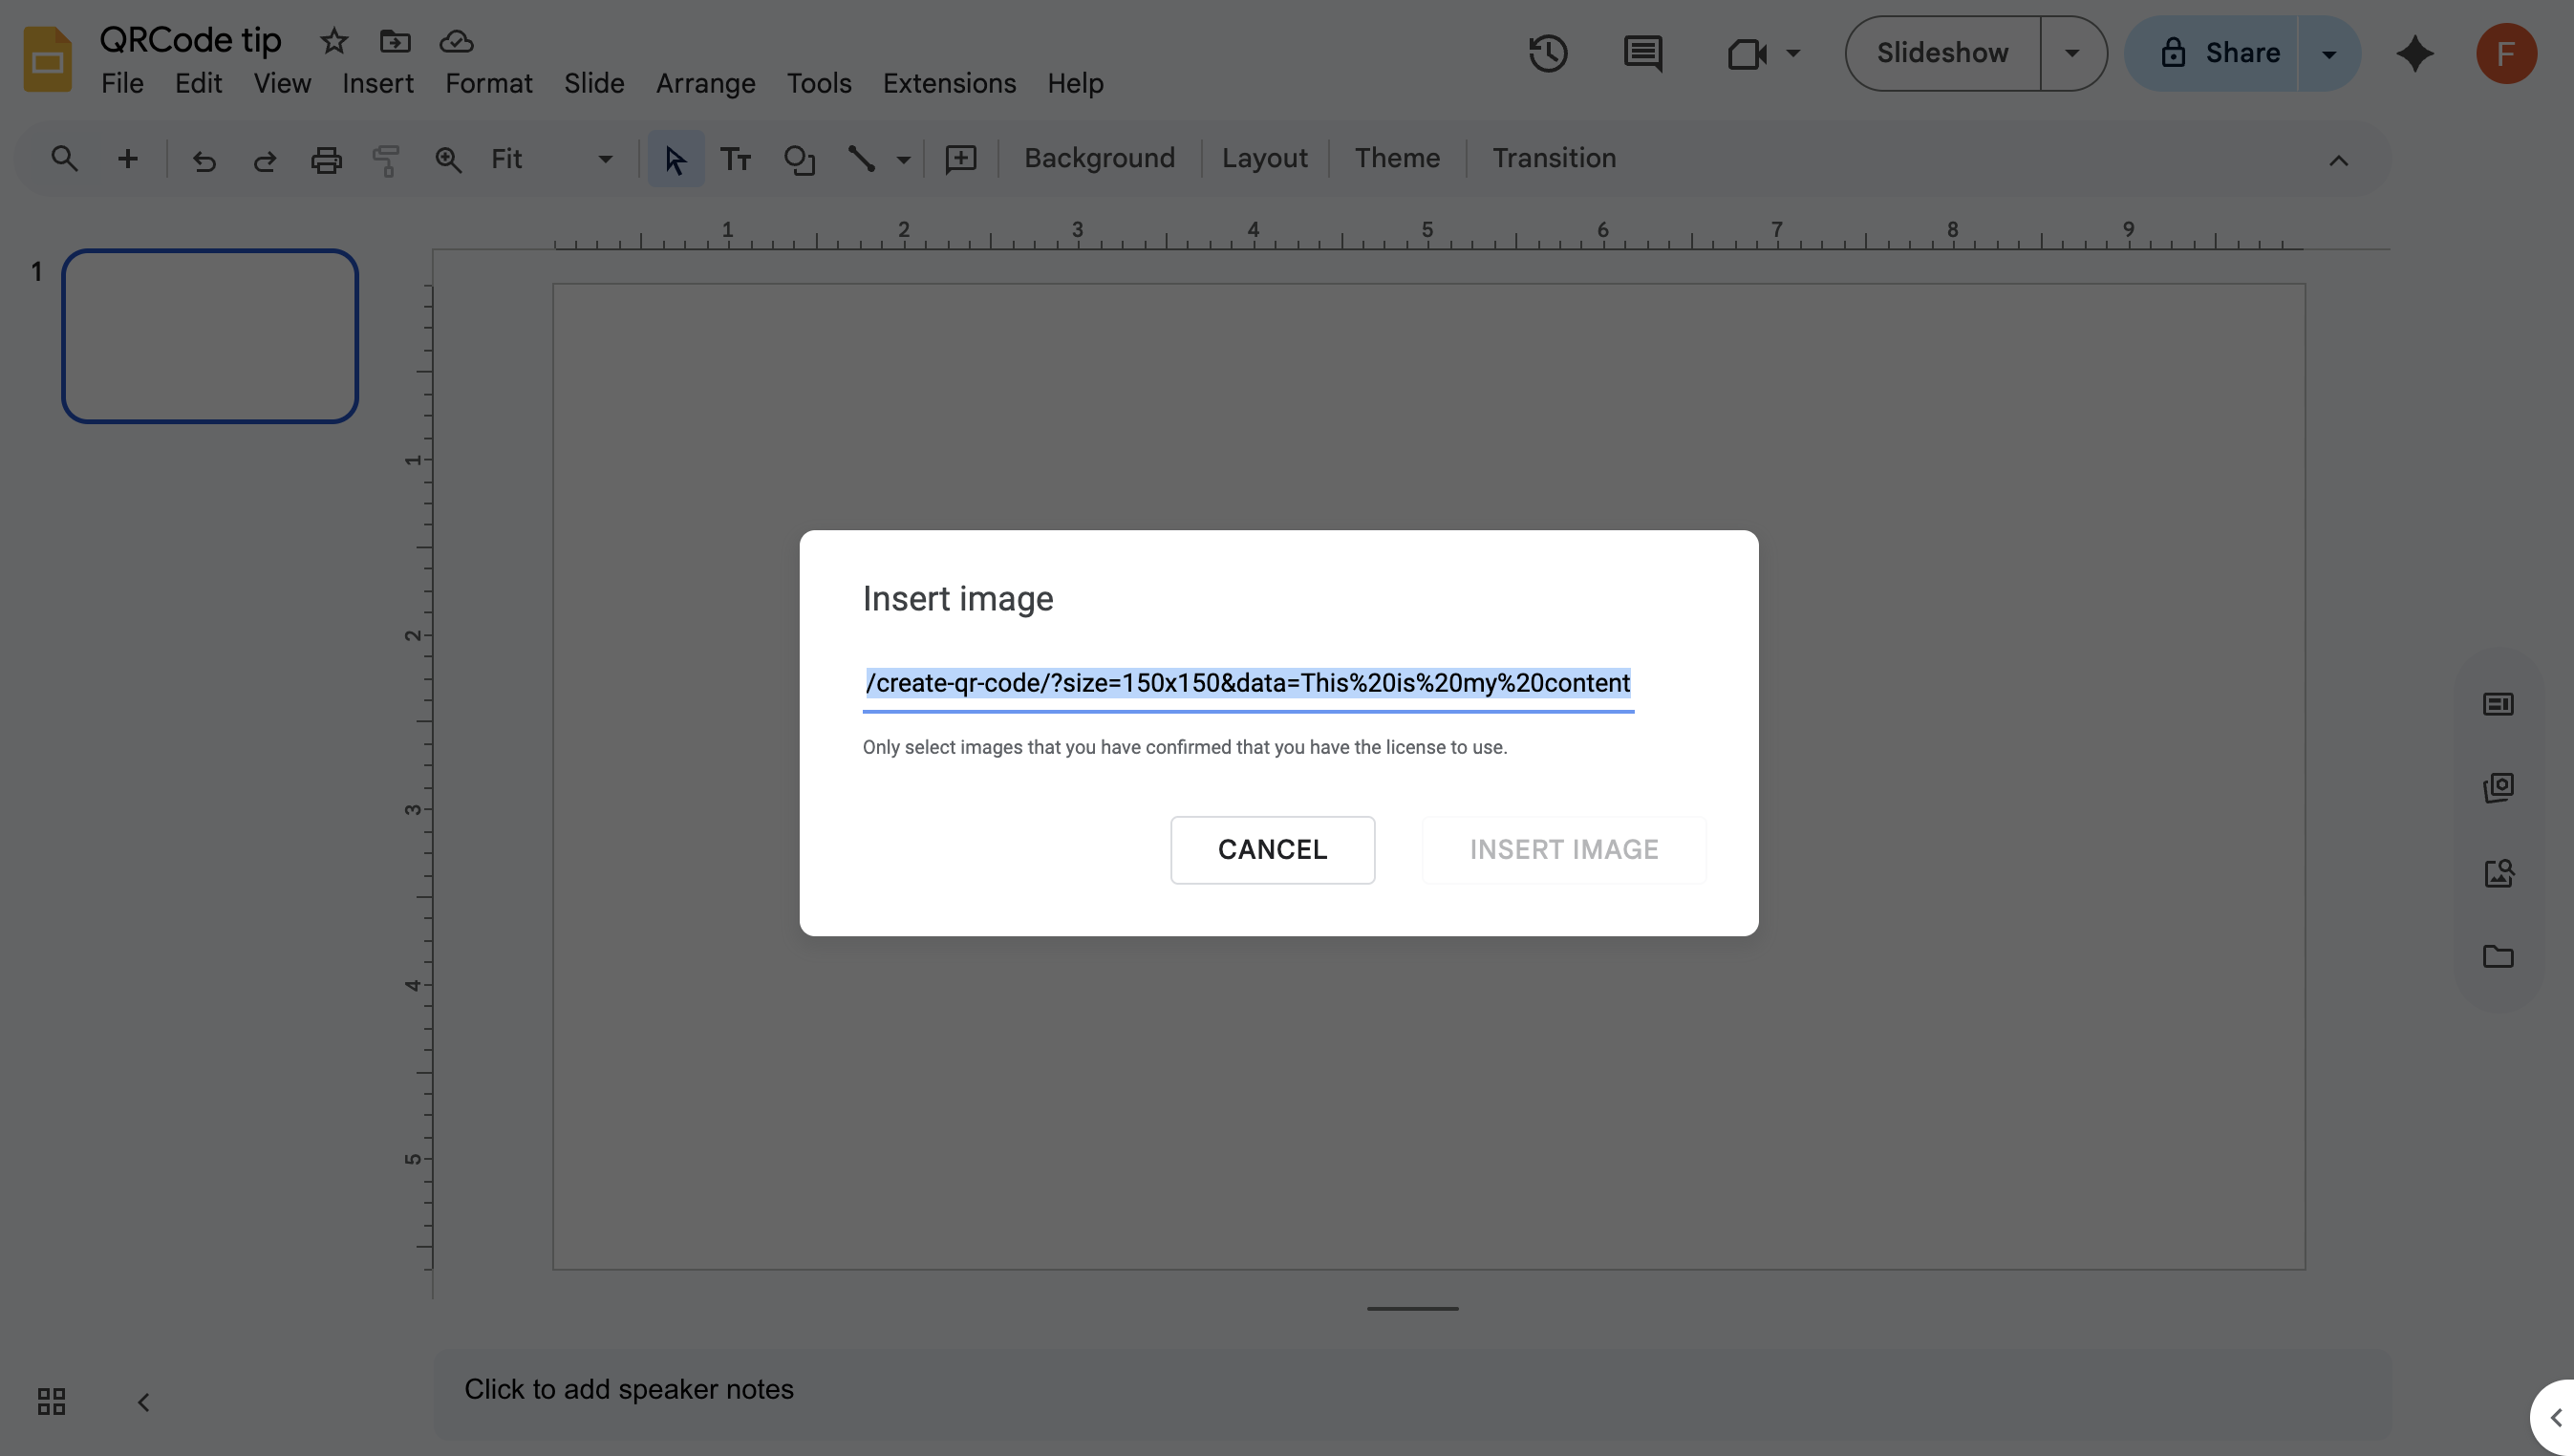
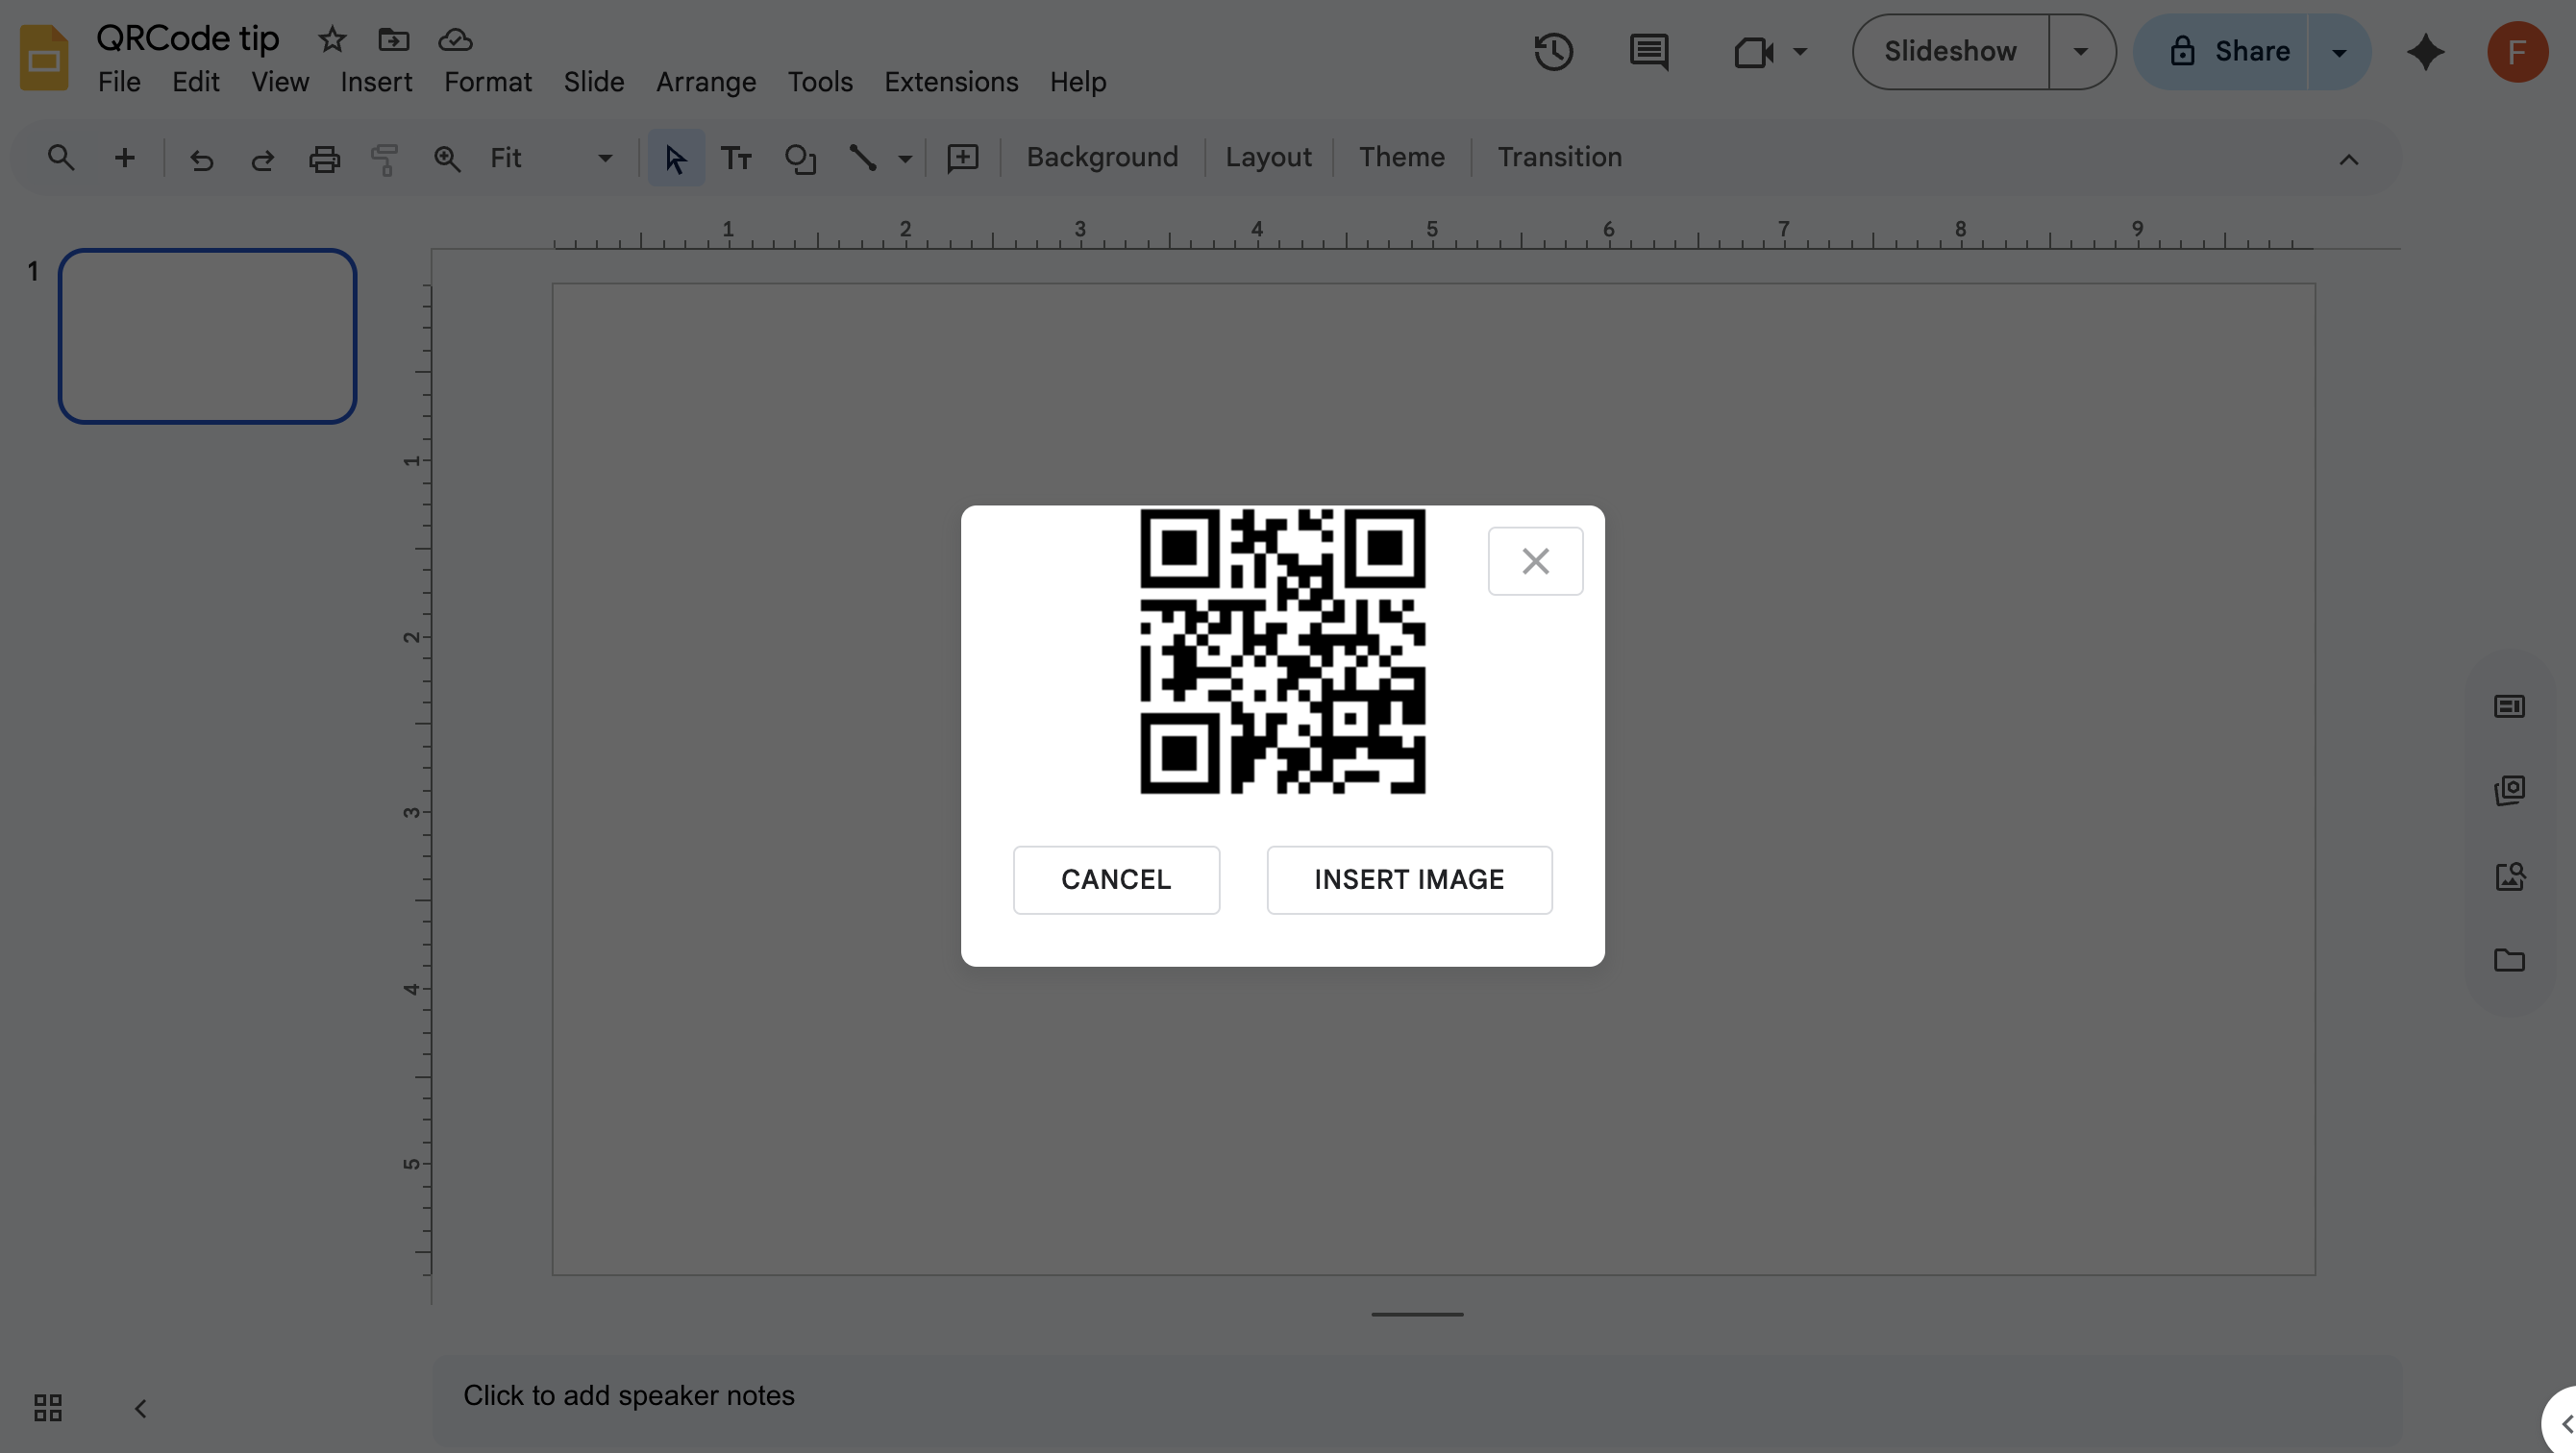
Step 3. Preview and Insert the QR Code
Once you paste the URL, Google Slides will display a preview of the generated QR Code in the modal. If it looks correct:
- Click Insert.
- The QR Code will appear directly in your slide.
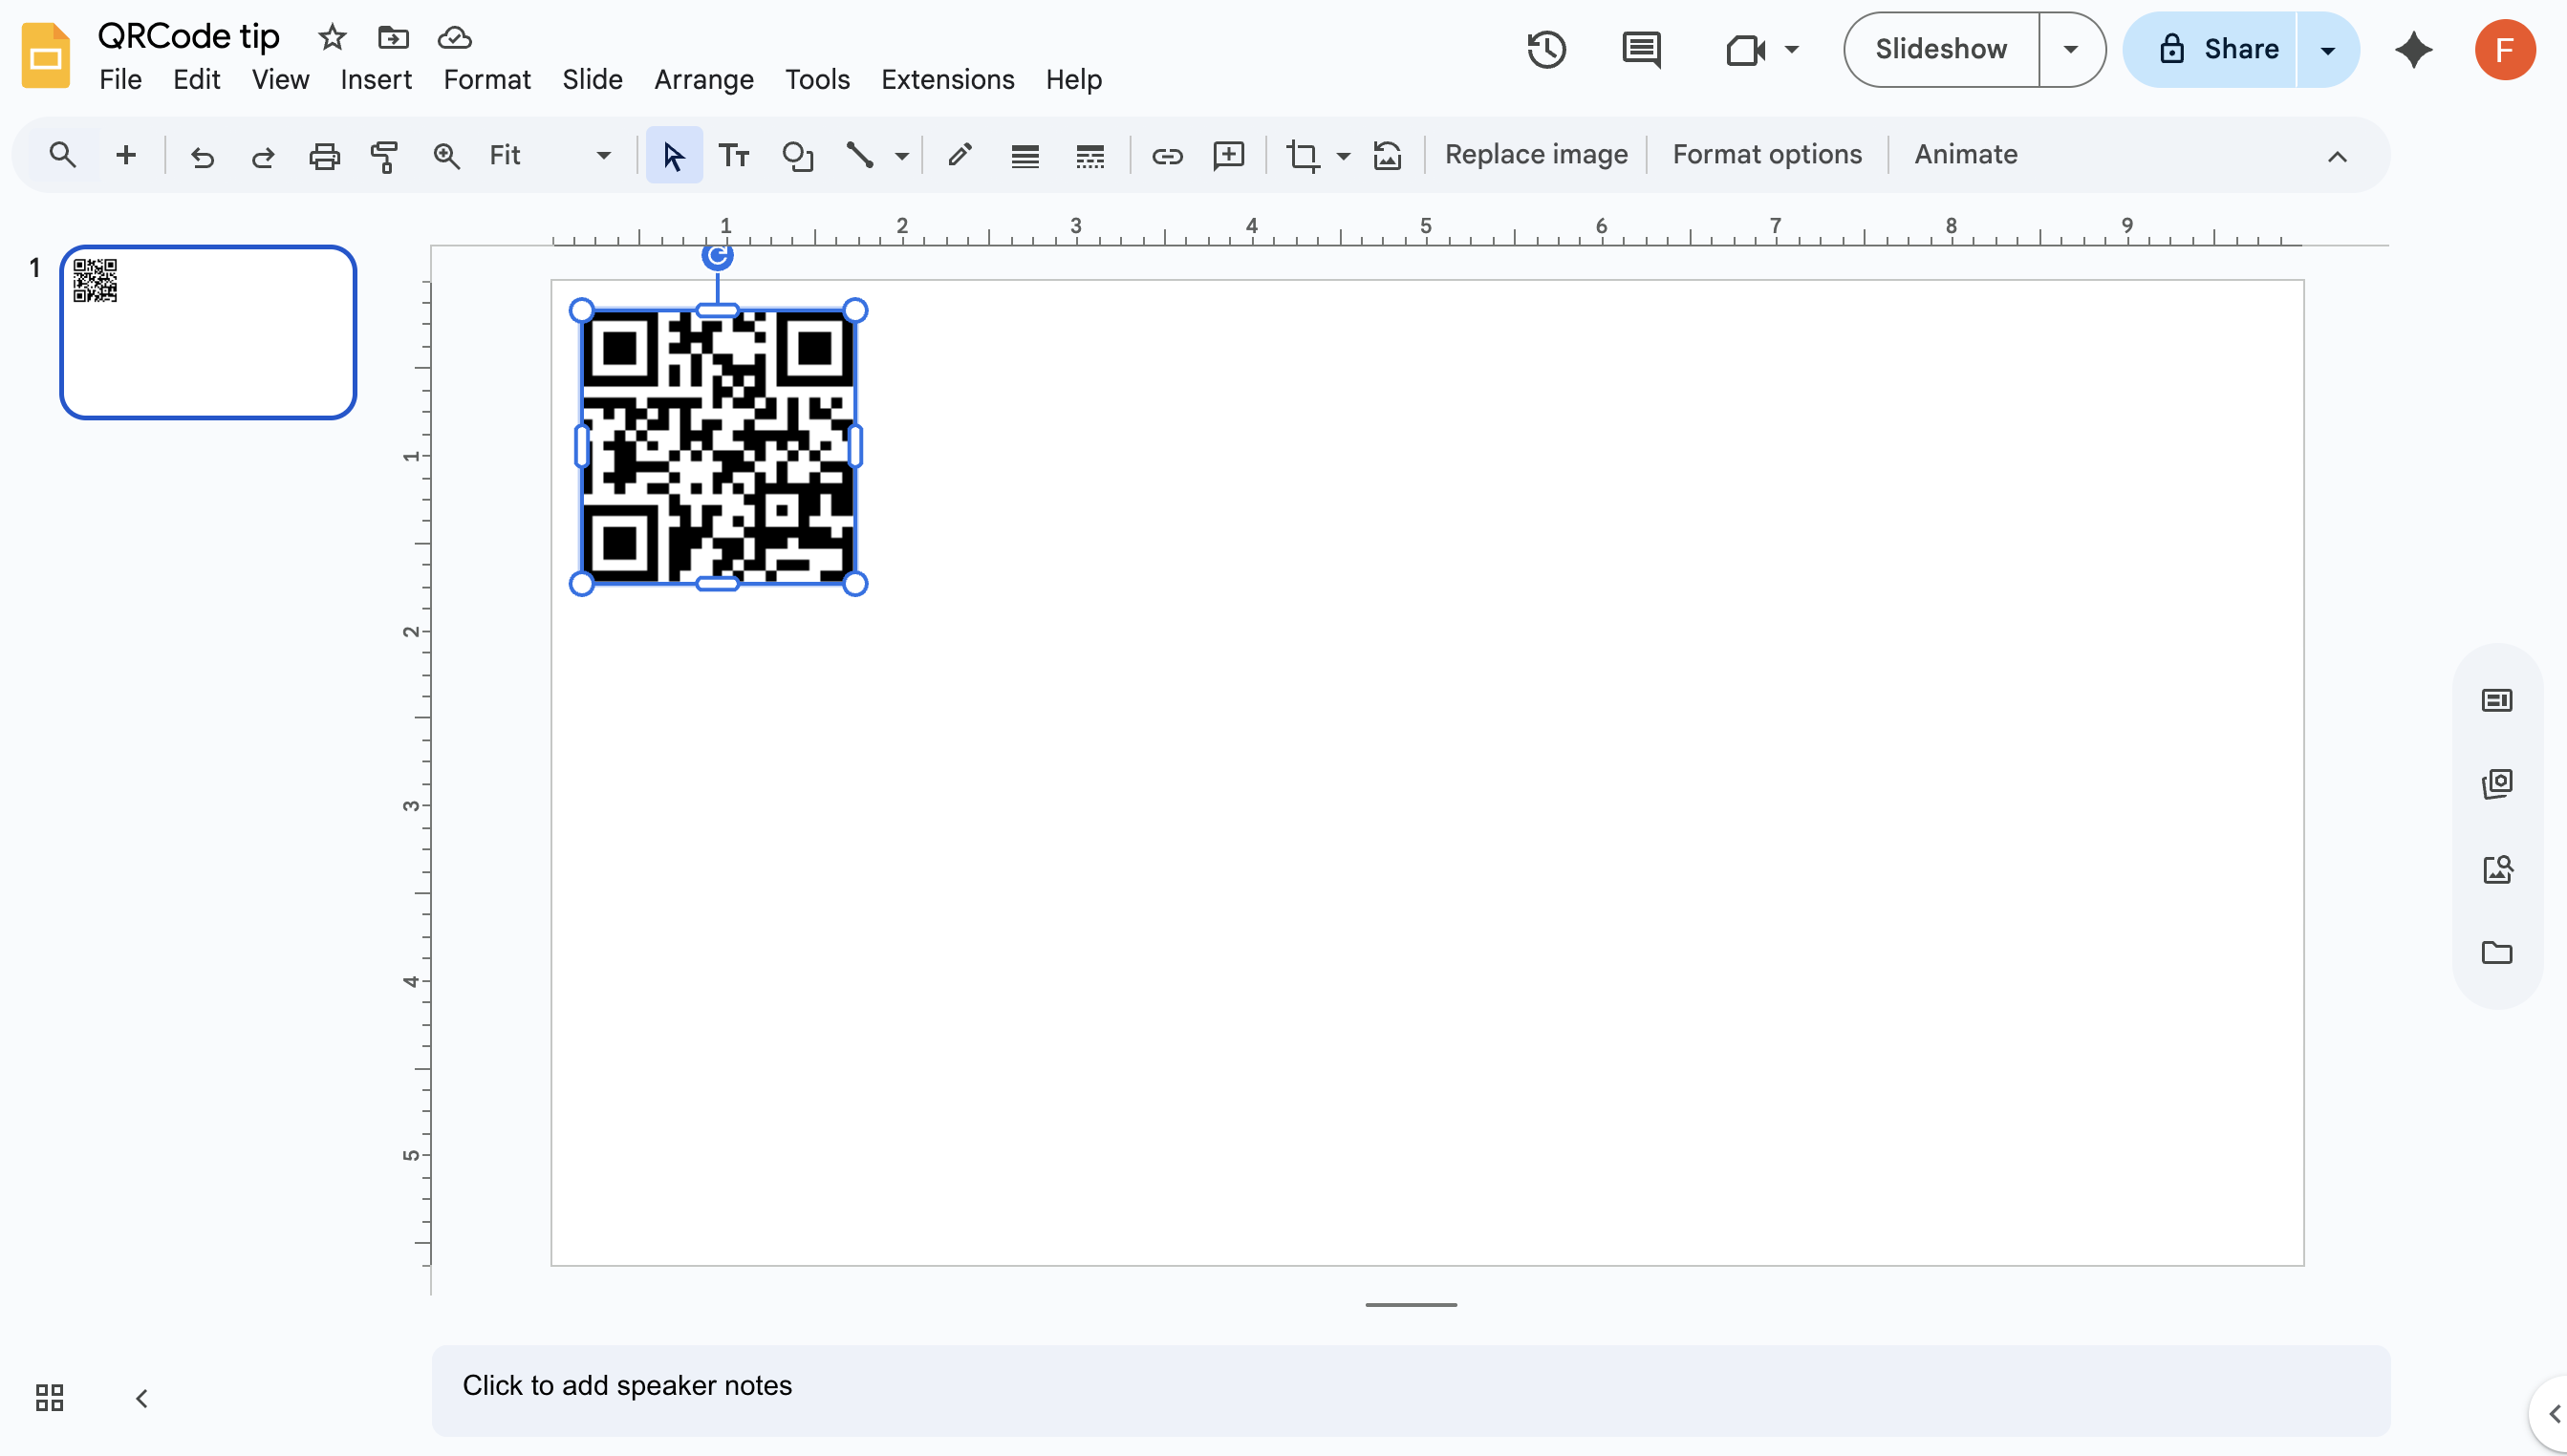
Step 4. Adjust and Use in Your Presentation
Now that the QR Code is in your slide:
- Resize it by dragging the corners
- Place it anywhere on the slide
- Test it by scanning with your phone to confirm it works
Bonus: Automating with DeckServe
If you need to generate QR Codes automatically for different slides or presentations, DeckServe can handle this in a fully dynamic way.
By setting up a placeholder in your template and linking it to a QR Code generation API, DeckServe can create the code on-the-fly whenever your document or slide deck is generated — no manual URL editing required.
Learn more in our QR Code automation tutorial.
Conclusion
This quick shortcut saves time when adding QR Codes to Google Slides. Instead of juggling multiple tools and file uploads, you can paste a URL, tweak parameters, and insert your code in seconds.
For more advanced use cases — such as dynamically generating codes based on spreadsheet data — consider integrating DeckServe for complete automation.